Introduction
In this guide, I’m going to show you how to secure your Traccar installation with SSL, so that it can be reached over https instead of http. Traccar is a free and open source modern GPS tracking system.
Since Traccar has no native support for encrypted connections, we’ll do so by setting up a Reverse Proxy using IIS (which is the recommended method by the developer). We’ll be using Let’s Encrypt to generate a free valid certificate for your Traccar installation.
Prerequisites
- A working Traccar instance, reachable over http (by default http://localhost:8082), installed on Windows Server 2012 R2 or Windows Server 2016.
- A Fully Qualified Domain Name (FQDN), for example ‘yourdomain.com’, with an A record pointing to the IP of your Traccar server:

(Of course, in the screenshot above, change the variables to meet your environment, i.e. replace ‘123.123.123.123’ with the IP of your Traccar server and ‘traccar.yourdomain.com’ with your own (sub)domain.
Please note that it can take up to 24 hours, but usually no more than 1-2 hours, for your DNS servers to ‘propagate’, i.e. sync your update with the rest of the world.)

Getting Started
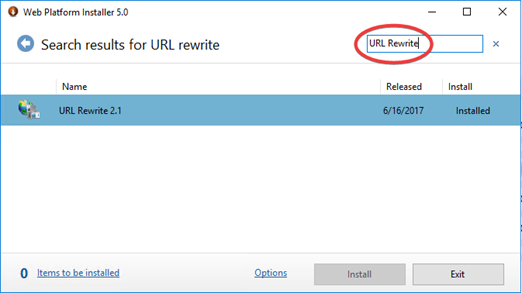
First, install the URL Rewrite add-on module. From Windows Server 2012 R2 and up, you can use the Microsoft Web Platform Installer (WebPI) to download and install the URL Rewrite Module. Just search for ‘URL Rewrite’ in the search options and click ‘Add’.
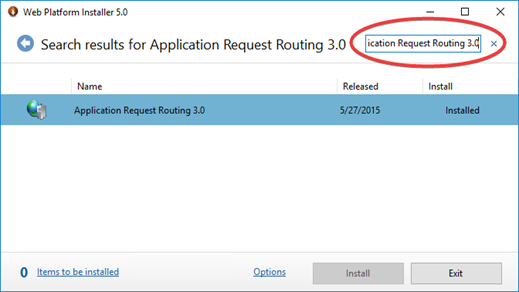
After installing, do the same for the Application Request Routing 3.0 add-on module:
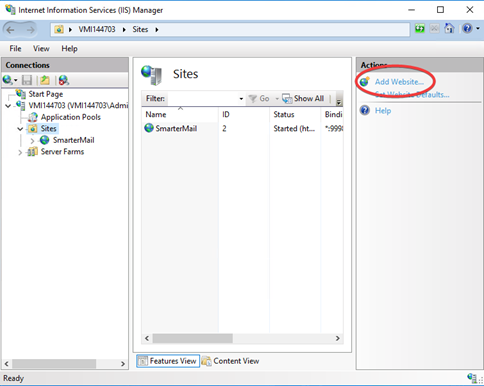
Next, open IIS and add a new website:
In the window that opens, fill in the following details:
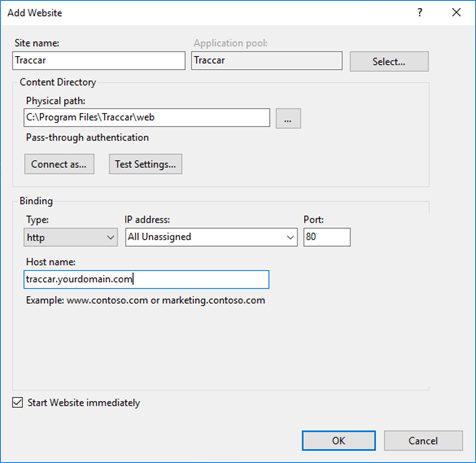
Change the variables to meet your environment.
Close IIS for now and download and install ‘Certify the web’, a free (up to 5 websites) SSL Certificate Manager for Windows (powered by Let’s Encrypt). Certify will automatically renew your certificates before they expire, so it pretty much takes care of itself.
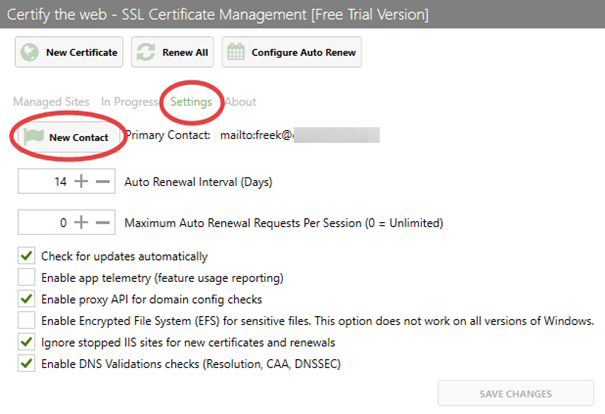
After installing, open Certify. Before we can request a new certificate, we first need to setup a new contact. This is mandatory. So, first, go to ‘Settings’ and set a ‘New Contact’:
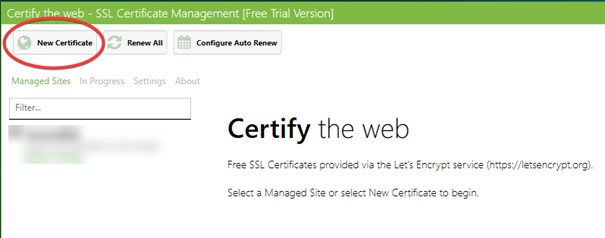
Next, click on ‘New Certificate’:
Select the website you created in IIS, in my case named ‘Traccar’:
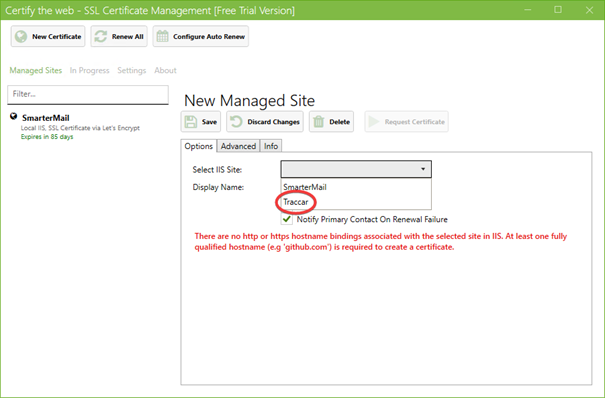
The rest of the information should now autofill, based on the details you entered in IIS.

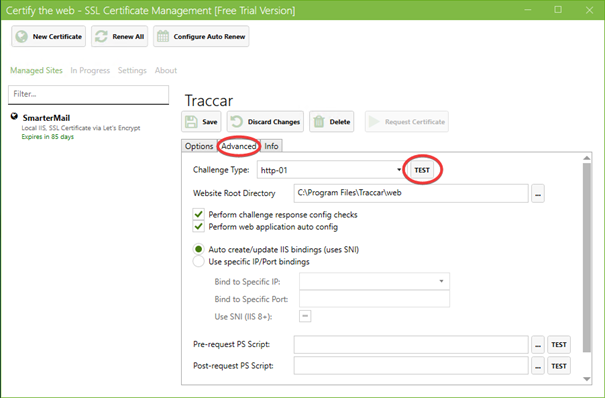
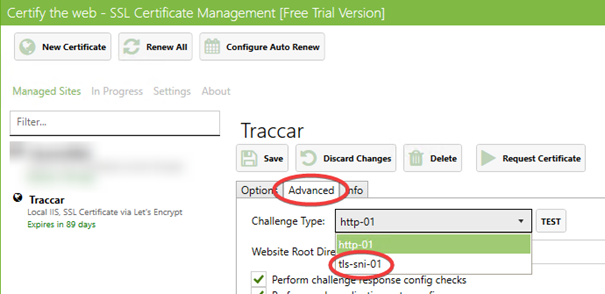
Next, go to the Advanced tab and click ‘Test’ to verify if everything is setup correctly
If all goes well, you should get this popup:

Click OK and click ‘Save’.
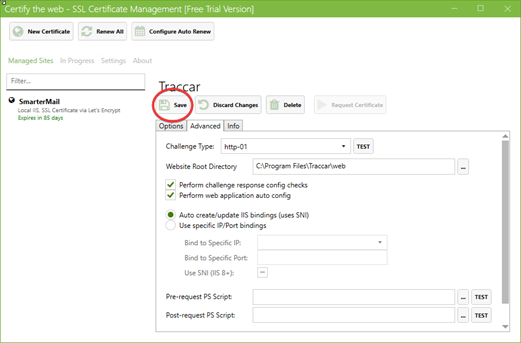
Next, click ‘Request Certificate’ to request your free valid SSL certificate from Let’s Encrypt for your Traccar installation:

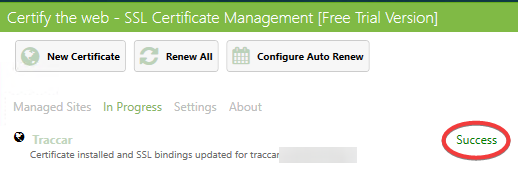
If all goes well, you should get ‘Success’
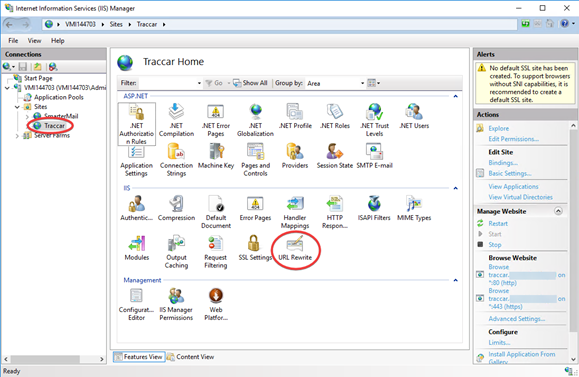
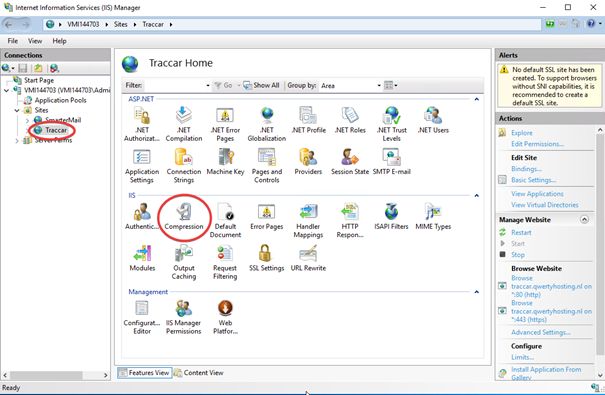
Next, close Certify and open IIS again. Go to the website you created (in my example Traccar) and click on URL Rewrite
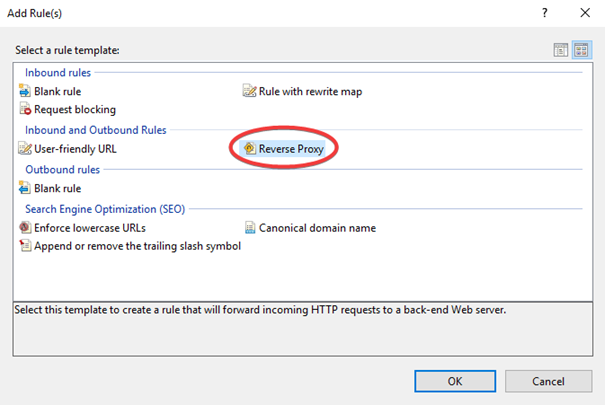
Click on ‘Add Rule(s)’ in the top right corner:

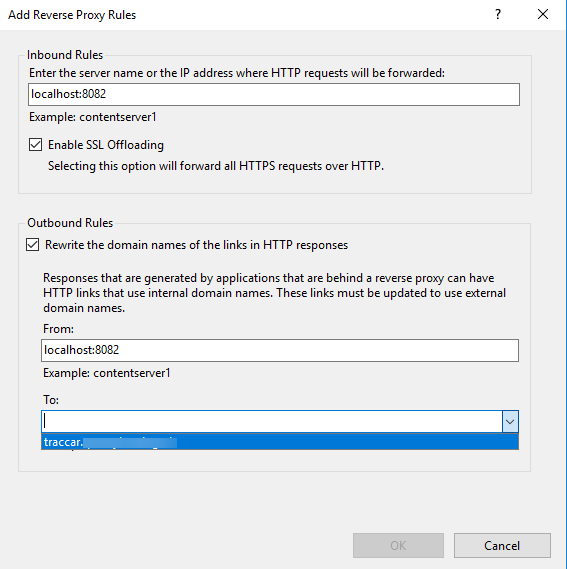
In the window that opens, click on ‘Reverse Proxy’ and click ‘Ok’
In the window that opens, enter ‘localhost:8082’ in the Inbound Rules text field,
select ‘Enable SSL Offloading’,
select ‘Rewrite the domain names of the links in the HTTP responses’ from ‘localhost:8082’
and select your Traccar domain from the dropdown menu, i.e. ‘traccar.yourdomain.com’ and click OK.
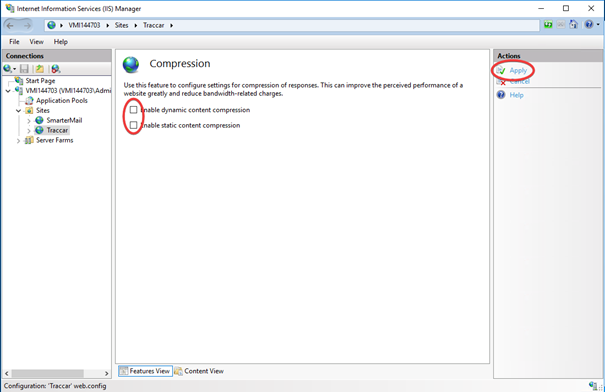
Next, go to your website in IIS again and click on Compression:
Outbound rewriting can only be applied on un-compressed responses. If the response is already compressed then URL Rewrite Module will report an error if any of the outbound rules is evaluated against that response. Therefore, we need to disable Compression in order to get Traccar to play nicely with IIS. Uncheck both options and click Apply:
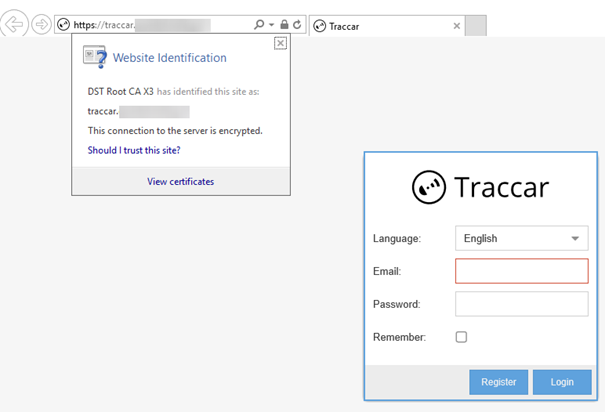
That’s it! We’re done! Your Traccar installation should now be reachable over HTTPS and have a valid SSL certificate:
If the website is not opening (times out), check if port 443 inbound is open in your firewall:

Optional
Since your website is now reachable over https, you can change the Challenge Type to tls-sni-01 in Certify:
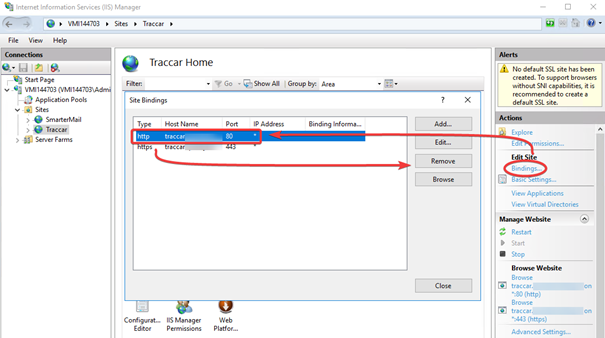
This way, you can remove the port 80 binding in IIS if you want, to force all traffic to your Traccar installation over https:
Have fun! Any questions or comments, let me know down below.
hello because it could be this error, search the internet and I did not find a solution
failed challenge test DNSSEC verification failed. DNS checks can be disabled in setting if required
DNSSEC is not covered in this tutorial. You can turn off DNSSEC at your DNS provider if it causes issues.
Obrigado pelo tutorial, correu quase tudo certo, eu estou recebo este erro: (erro com a conexão web soquete) só ocorre em https.
em http não ocorre o erro, alguma dica ?
Conseguiu resolver isso?
Infelizmente não mas irei pesquisar novamente.
tanks for all, excellent work
I also recieve “web socket” using https
I also recieve “web socket” error using https
Same here, anyone have a fix for this?
The sloution for https and wss connection i found:
First add the server variable to IIS manager: Your site > URL Rewrite > View Server Variables… > Add: HTTP_SEC_WEBSOCKET_EXTENSIONS
Then add the variable to the inbound rule that forwards requests to Home Assistant. This is my rule in web.config:
You can also add the variable to the inbound rule with IIS-Manager, but it forces you to enter a value. You still end up with editing web.config to clear the value.
Dear Lukas, please write a rule in web.config, thank you.
And the web.config:
<!– if you want to use https only –>
<rule name="HTTP/S to HTTPS Redirect" enabled="true" stopProcessing="true">
<match url="(.*)" />
<conditions>
<add input="{HTTPS}" pattern="^OFF$" />
</conditions>
<action type="Redirect" url="https://{HTTP_HOST}/{R:0}" redirectType="Permanent" />
</rule>
<!– the trick is here –>
<rule name="Forward to Traccar" stopProcessing="true">
<match url="(.*)" />
<action type="Rewrite" url="http://localhost:8082/{R:0}" logRewrittenUrl="true" />
<serverVariables>
<set name="HTTP_SEC_WEBSOCKET_EXTENSIONS" value="" />
</serverVariables>
</rule>
i had followed the tips here
still didn’t work in any browser kept saying websockets error
then realised i didn’t have websockets installed in iis
so ran this powershell command Install-WindowsFeature -name Web-WebSockets
All working now
Hello Lukas,
can you explain it in details, please ? I don’t know how and where i have to add the rule.
If i edit the web.config, i get an server error, so i restored the original web.config.
Thank you.
Tom
Yes pls some body ? help
Im followed the steps im getting 503 service unavailable error on browser any help pls!?
For all with the same problem, read this, this is helpful to understand.
https://www.traccar.org/forums/topic/tutorial-how-to-secure-traccar-with-ssl-https-for-free-using-iis-and-lets-encrypt-on-windows-server/page/3/
Tom
I got websocket error help ?
how to add role in web.config
At this “Next, go to the Advanced tab and click ‘Test’ to verify if everything is setup correctly” step i have an error. And when i try to go to mydomain.com that pointed to traccar/web as it says in this tutorial it says 403 forbidden why?
hi..
i succeed change localhost:8082 to mydomain.com
but..
car device icon didnt came out/ didnt show?
can some one give me advice?
Traccar web notifications are not working with port 80 or 443 after iis reverse proxy. Web notifications only work when default port 8082 is used. Any suggestions how to resolve this issue while using iis reverse proxy ?
problem solved.
follow this link its not being mentioned in this post but has to be done in order to make pop ups work
https://www.oxygenxml.com/doc/versions/24.1.0/ug-waCustom/topics/WA-websocket.html
Hi.
I like to add SSL to my traccar 5.5 installation, but running on Windows 10 not Windows Server 2012/2016.
Do you know if it also works with IIS on Win 10? I am not going for Let’s encrypt as I have a valid SSL certificate.
Thanks,
Michael
Thank you for your tutorial!
It worked like a charm for me. Really appreciate your effort to document the process.
Still works perfectly in 2024. Thank you!
Nice! Success full. still worked.